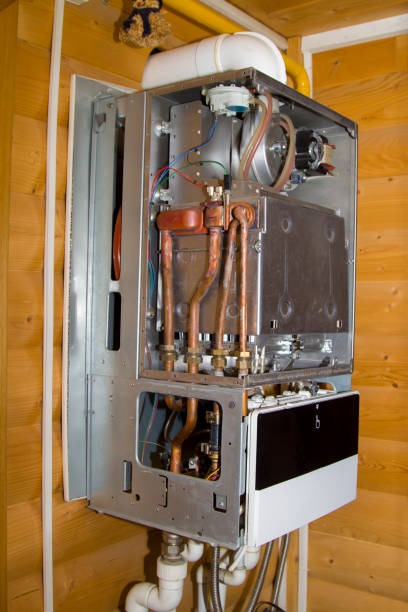
Boiler Installation in Milwaukee, WI
Boiler Installation in Milwaukee, WI
Replacing or installing a new boiler is one of the most important investments you can make for year-round comfort and energy savings in Milwaukee homes. With long, cold winters, many Greater Milwaukee residences still rely on aging boilers that are inefficient, costly to operate, or out of code.

Why a proper boiler installation matters in Milwaukee
Milwaukee winters bring heavy heating demand, freeze risk, and in some neighborhoods, older masonry chimneys and compact mechanical rooms. An undersized or poorly installed boiler leads to short-cycling, higher fuel bills, premature component failure, and potential safety risks. A correctly sized, code-compliant boiler improves comfort, reduces operating costs, and minimizes carbon footprint — particularly when switching to high-efficiency or condensing models suited to Wisconsin’s climate.
Common boiler types and which works best in Milwaukee
Understanding boiler types helps you match equipment to your home, fuel availability, and long-term goals.
- Condensing boilers
- Best for maximizing efficiency when replacing older systems.
- Recover heat from flue gases, delivering higher AFUE ratings.
- Often require PVC or stainless-steel venting and a condensate drain.
- High-efficiency gas boilers
- Provide reliable performance with good efficiencies in colder climates.
- Ideal if natural gas service is available; common choice in Milwaukee.
- High-efficiency oil boilers
- Practical for homes not served by natural gas; modern oil units are much cleaner and more efficient than older models.
- May require upgraded venting and fuel tank considerations.
- Steam boilers
- Typically found in older Milwaukee homes and multifamily buildings.
- Steam systems require specialized sizing and maintenance; replacing or converting to hot-water hydronic may be an option for efficiency gains.
Heat-load assessment and correct system sizing
A professional heat-load assessment (using Manual J or equivalent) is the cornerstone of a reputable installation. The assessment accounts for:
- Square footage, ceiling height, insulation levels, window type, and air infiltration.
- Local climate data: design temperatures for Milwaukee winters to ensure adequate capacity on the coldest days.
- System distribution losses: old radiators, baseboard, or in-floor piping performance.
Proper sizing prevents oversizing (wasted fuel, cycling) and undersizing (inadequate heat on extreme cold days). The assessment also identifies duct or piping upgrades and recommended controls.
Fuel, venting, and combustion air considerations
Fuel choice and venting strategy affect installation complexity and operating cost.
- Natural gas: common in Milwaukee; efficient condensing and non-condensing options available. Requires proper gas line sizing and combustion air.
- Oil: still present in some neighborhoods; conversion to gas may be viable but involves fuel line and venting changes.
- Venting: condensing boilers often use high-grade PVC or stainless-steel liners; non-condensing and oil units may use chimney or metal vents and sometimes need chimney relining.
- Combustion air: sealed combustion or direct venting is preferred to maintain indoor air quality and meet code.
Permits and code compliance in Milwaukee
Installations must conform to Wisconsin state mechanical and plumbing codes and local City of Milwaukee regulations. Typical requirements include:
- Permit from the local authority having jurisdiction and inspection scheduling.
- Proper combustion air, venting clearances, and gas piping testing.
- Pressure relief valves, expansion tanks, backflow prevention (where applicable), and correct electrical connections.
- Combustion efficiency testing and carbon monoxide checks before final approval.
Your installer should handle permit submittal and coordinate inspections to ensure a code-compliant result.
Step-by-step installation timeline
Installations vary by project scope, but a typical timeline looks like this:
- On-site survey and heat-load assessment; equipment selection and system design.
- Permit application and approval (timing depends on local jurisdiction).
- Pre-install prep: ordering equipment, scheduling shutdown, and site protection.
- Removal of old boiler and safe disposal or recycling of components.
- Mechanical rough-in: new boiler placement, piping modifications, venting installation or chimney liner work.
- Fuel and electrical connections: gas or oil lines, wiring for controls and pumps.
- System fill, air purging, and pressure tests; installation of expansion tank and safety devices.
- Combustion tune and efficiency testing; CO and venting verification.
- Final inspection by local authority and issuance of occupancy/compliance sign-off.
- Customer orientation on controls, maintenance needs, and warranty documentation.
Smaller straightforward replacements can be completed in 1 to 3 days. More complex upgrades, conversions, or projects requiring chimney work and extensive piping can take a week or more.
Warranty, financing, and protection options
Boilers come with manufacturer warranties for heat exchangers and parts; installers typically provide labor warranties for a defined period. Extended protection plans may be available for parts and annual maintenance.
Financing options through third-party lenders or home improvement plans can spread the investment over time; terms and availability vary. Ask about manufacturer and utility-sponsored promotions and how warranties are registered and honored.
Energy-efficiency benefits and local rebates
Upgrading to a high-efficiency or condensing boiler yields:
- Lower fuel consumption and monthly heating costs.
- Reduced greenhouse gas emissions and quieter operation.
- Better temperature control and longer system life when paired with proper controls.
Wisconsin homeowners may qualify for incentives and rebates through programs such as Focus on Energy and occasional municipal or utility rebates. Federal tax incentives for energy-efficient home improvements may also apply depending on current programs. Confirm eligibility and documentation requirements before installation.
Post-installation testing and customer orientation
A thorough final inspection and orientation should include:
- Combustion efficiency testing and CO checks with documented results.
- Pressure and leak testing of the hydronic or steam system.
- Demonstration of thermostat and control settings, including setback schedules or zoning.
- Review of safety devices, maintenance schedule, and warranty paperwork.
- Written startup report and recommended next steps for preventative maintenance.
Maintenance and long-term care
To protect your investment and maintain efficiency in Milwaukee conditions:
- Schedule annual winter-startup inspections and tune-ups.
- Flush and treat hydronic water as recommended to prevent corrosion and deposits.
- Keep vents, air intakes, and equipment clear of snow and debris.
- Bleed radiators or purge air from in-floor systems after the first warm-up.
- Monitor for unusual noises, cycling behavior, or sudden changes in fuel use.
A correctly installed boiler sized for Milwaukee winters will deliver reliable comfort, lower operating costs, and peace of mind for years. Proper design, code compliance, and post-install testing are essential to achieve those outcomes.
Maintenance Plan
SILVER PLAN (Heating & cooling packages
Our Silver Plan provides you with year-round, worry-free protection. The benefits include:
$129.95
/plan cost every 6 months
Inspection and cleaning of your system during service visits.
Next-day scheduling & 24-hour emergency service.
Full coverage for labor on repairs due to equipment failure.
15% Discount on all parts for repairs and upgrades.
15% Discount on additional system installation.

2
visits per year
1
year in duration
15%
discount on jobs
Cooling
Lubricate motors
Clean condensate line
Check fan belts
Check performance of system
Change filters
Check contactor points
Check evaporator air temperatures
Check pressure switches
Check wiring & connections
Clean condenser coil
Check refrigerant charge
Check temperature differential
Check operating pressures
Check evaporator coil
Check voltage and AMP draw
Heating
Lubricate motors
Check wiring & connections
Adjust controls if needed
Clean burners/flame sensor.
Adjust combustion air to burners
Check Ohms and amps of furnace
Check blower
Check heat exchanger for cracks (if accessible)
Change filters, standard pleated filters included
Check performance of system
Check air temperature rise
Check C.O. levels


