
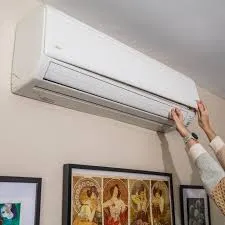
Mini-Split Installation in Menomonee Falls, WI

Mini-Split Installation in Menomonee Falls, WI
Choosing professional mini-split installation in Menomonee Falls, WI gives homeowners precise zone control, high seasonal efficiency, and a low-impact alternative to full ductwork projects. Whether you live in an older bungalow, a new addition, or a finished basement, a ductless mini-split can deliver both heating and cooling year-round—important in Menomonee Falls where hot, humid summers and cold, snowy winters demand flexible, reliable systems.
Why a mini-split makes sense in Menomonee Falls
- Zoned comfort for rooms that need independent temperature control: bedrooms, home offices, sunrooms, and additions.
- Superior efficiency compared with legacy electric resistance or window units—especially valuable given Wisconsin’s long heating season.
- Minimal home disruption: no duct demolition, smaller exterior footprint, and faster installation timelines.
- Effective as a primary heating source in many homes when sized correctly, or as supplemental heat to reduce reliance on older furnaces.
Common mini-split installation needs and issues in Menomonee Falls
- Homes without ductwork or with inefficient ducts needing targeted comfort solutions.
- Poorly located indoor units causing uneven temperatures or short cycling.
- Condensate drainage problems in basements or rooms with limited outside wall access.
- Outdoor unit exposure to snow accumulation and road salt leading to corrosion or restricted airflow.
- Undersized systems that struggle during peak winter lows; oversizing that causes short cycles and comfort problems.
Site assessment and load calculations
A professional installation always begins with a detailed site assessment and a Manual J style load calculation. This evaluates:
- Square footage, insulation levels, window orientation and glazing, ceiling height, and air infiltration.
- Heating load versus cooling load—critical in Menomonee Falls because heating demands typically exceed cooling.
- Placement constraints for indoor heads and the outdoor condenser (clearances, elevation to avoid snowdrift contact, and proximity to bedrooms).Accurate calculations prevent common problems like undersizing that can leave rooms cold in January, or oversizing that reduces efficiency.
Selecting the right equipment
Choosing the right indoor and outdoor units and capacities involves:
- Matching capacity to calculated loads, not just room size. Multi-zone outdoor units allow multiple indoor heads with properly balanced capacities.
- Considering low-temperature performance if the mini-split will serve as a primary heater during Wisconsin winters. Look for units rated for efficient operation at lower ambient temperatures.
- Deciding indoor head style: wall-mounted, ceiling cassette, ducted short-run, or floor console—based on aesthetics, airflow needs, and installation constraints.
- Evaluating features like inverter-driven compressors, variable-speed fans, smart controls, and filtration options for indoor air quality.
Line-set and electrical requirements (what to expect)
Professional installers will handle:
- Refrigerant line-sets (copper) sized and routed to meet manufacturer length limits and vacuum/charge requirements.
- Condensate management: gravity drains, condensate pumps, or drain lines routed through walls to a proper discharge point.
- Electrical supply and disconnects: dedicated branch circuit and disconnect per local code; many systems require 208/230V, while smaller single-zone units may use 115V. A licensed electrician typically completes final electrical connections and breaker sizing.
- Communication wiring between indoor and outdoor units for multi-zone systems.
Step-by-step professional installation process
- Initial site visit and load calculation — confirm placement, access, and required capacities.
- Equipment selection and permit prep — specify models, gather documentation for local permitting and incentive applications.
- Permitting — submit electrical/mechanical permits to the Village of Menomonee Falls building department as required.
- Outdoor unit pad and mounting — install a concrete or vibration-isolating pad elevated off the ground to avoid snow contact.
- Indoor unit installation — mount brackets, create small wall penetrations, and secure indoor heads in optimal airflow positions.
- Run line-sets, drain, and electrical — route refrigerant and condensate lines, pull power, and install disconnects.
- Evacuation and charging — vacuum the system to remove moisture and non-condensables, then charge with the correct refrigerant per manufacturer specs.
- System startup and balancing — verify temperatures, airflow, pressures, and controls.
- Inspection and final sign-off — coordinate local inspections where required.
- Homeowner orientation — demonstrate controls, maintenance items, and operation modes.
Permitting and rebate guidance
Local permits are commonly required in Menomonee Falls for mechanical and electrical work. Installers should submit the necessary plans and obtain inspections to ensure code compliance. For incentives, check available Wisconsin programs and utility rebates as well as federal energy tax credits that may apply to high-efficiency heat pump installations. Keep manufacturer documentation and permit receipts—these are typically required for rebate and tax credit applications.
Warranty and financing options
- Manufacturer warranties typically cover compressors and major components; installer labor warranties may provide additional protection for workmanship.
- Extended coverage plans are often available for parts and labor beyond the standard period.
- Financing is commonly offered through third-party programs and lenders structured to spread the cost over time; financing approvals vary by credit and program terms.Ask for written warranty details and a clear explanation of what is covered under both manufacturer and installer warranties.
Post-installation testing and homeowner orientation
After installation professionals will:
- Perform leak and pressure tests, confirm correct refrigerant charge, and measure airflow and temperature differentials.
- Show you how to operate thermostats, remote controls, and any integrated smart features or apps.
- Explain routine maintenance: cleaning or replacing filters, keeping outdoor units clear of snow and debris, and recommended seasonal inspections.
Timelines and what to expect
- Site assessment and quote: generally completed within a few days of the initial request.
- Permitting: can range from a few days to a couple of weeks depending on workload at the village building department.
- Installation: a single-zone wall-mounted mini-split is often completed in 4 to 8 hours; multi-zone systems or ducted indoor units typically require 1 to 3 days.
- Final inspection and orientation: usually completed the same day as installation or shortly after scheduling.
Maintenance tips and local considerations
- Keep the outdoor unit elevated and clear of snow; shovel a path and clear airflow during winter.
- Rinse outdoor coils in spring to remove winter debris and road salt residue; consider anti-corrosion options where salt exposure is high.
- Replace or clean indoor filters monthly during high-use seasons and schedule annual professional tune-ups before the heating and cooling seasons.
Mini-split installation in Menomonee Falls, WI, is a practical, efficient way to improve comfort in specific rooms or as a primary heat and cooling solution. Proper assessment, accurate sizing for Wisconsin’s climate, correct line-set and electrical preparation, and thorough commissioning are the keys to reliable, long-lasting performance.
.png)
The Healthy Home Club is a year-round home maintenance plan designed to prevent breakdowns, catch issues early, and provide priority service when needed.
Essential Plan
$29/month
Annual HVAC, plumbing & electrical inspections
Priority scheduling
Priority scheduling
Reduced diagnostic fees
10% off repairs
Complete Plan
$39/month
Everything in essential
No after-hours diagnostic fees
15% off repairs
Extended warranty eligibility
Total Protection $49/month
Everything in complete
Annual water heater flush
Advanced system checks
1 free emergency dispatch per year
VIP priority scheduling
HVAC
Seasonal tune-ups to keep systems running efficiently
Plumbing
Annual whole-home inspection to catch issues early
Electrical
Safety inspection to identify risks
Most Home Breakdowns Are Preventable
Most issues don’t happen overnight — they build over time. The Healthy Home Club helps catch problems early so homeowners can avoid unexpected repairs.
Member Benefits
- Priority service
- Discounts on repairs
- No after-hours fees
- Fewer unexpected breakdowns